Artist To Fan Emailing System
Artist to Fan Emailing System
Your Artist Account comes with an email collections center and an outgoing email system.
There are two options how you can stay in touch with your fans. Those are RR messages and Mass Mailing.
RR messaging system provide seamless communication and 100% deliverability of your messages. They will no go to spam folder or abandoned mail box. It is completely free and there are no limits.
Things you should know about sending emails via Mass Mailing:
- This feature is turned off when you first create your Artist Account.
- Once you have a list of at least 100 fan emails, you can request that we turn it on. You can also request for us to turn on this feature if you already have an email list of over 100 with another service and you want to be able to import those emails into your RR account. Use the (?) question mark / contact us form at the bottom right inside of your Creator Account to message our team to request access!
- There is a limit of 5,000 emails sent per month but you can request an increase. This is just a safeguard to keep a bad actor from abusing our system.
- There is no charge for less than 5,000 emails sent per month. We do not charge for more than 5,000 emails sent, but we reserve the right to charge for an artist that wants to send a large amount of emails each month.
Here's How It Works
- When fans join RR while on your website, they're asked to share their email with you, the artist. Most do share it but you are still allowed to email the ones that don't as long as they FOLLOW you. (Fans have the ability to turn this off if they want.) This means that 99% of the time when you convince a fan to create an RR account while on your website, you get to email them. You can give away digital items using Gift Codes and sell them merch. There are many different ways to capture your fans' email.
- The old fashioned way is to place a Mailing List Feature on your website to collect fans' email addresses. You can do this, but this does not create an RR account for the fan. They can't buy items, use a gift code, comment on songs or even follow you unless they have an RR account. The best way to get their email is to use one of the methods mentioned above.
- Once you have collected the emails, use the Artist to Fan Emailing System to keep your fans updated on new releases, upcoming music drops, music videos, new merch designs, shows and anything else you think they need to know.
- Creating your own templates for future email campaigns is easy. That way, you can reuse these templates in the future.
- Easily manage all of your contacts right from within your Rhythmic Rebellion Account.
To find your fans' emails, go to the Fans tab at the top, then Mailing List on the left side menu.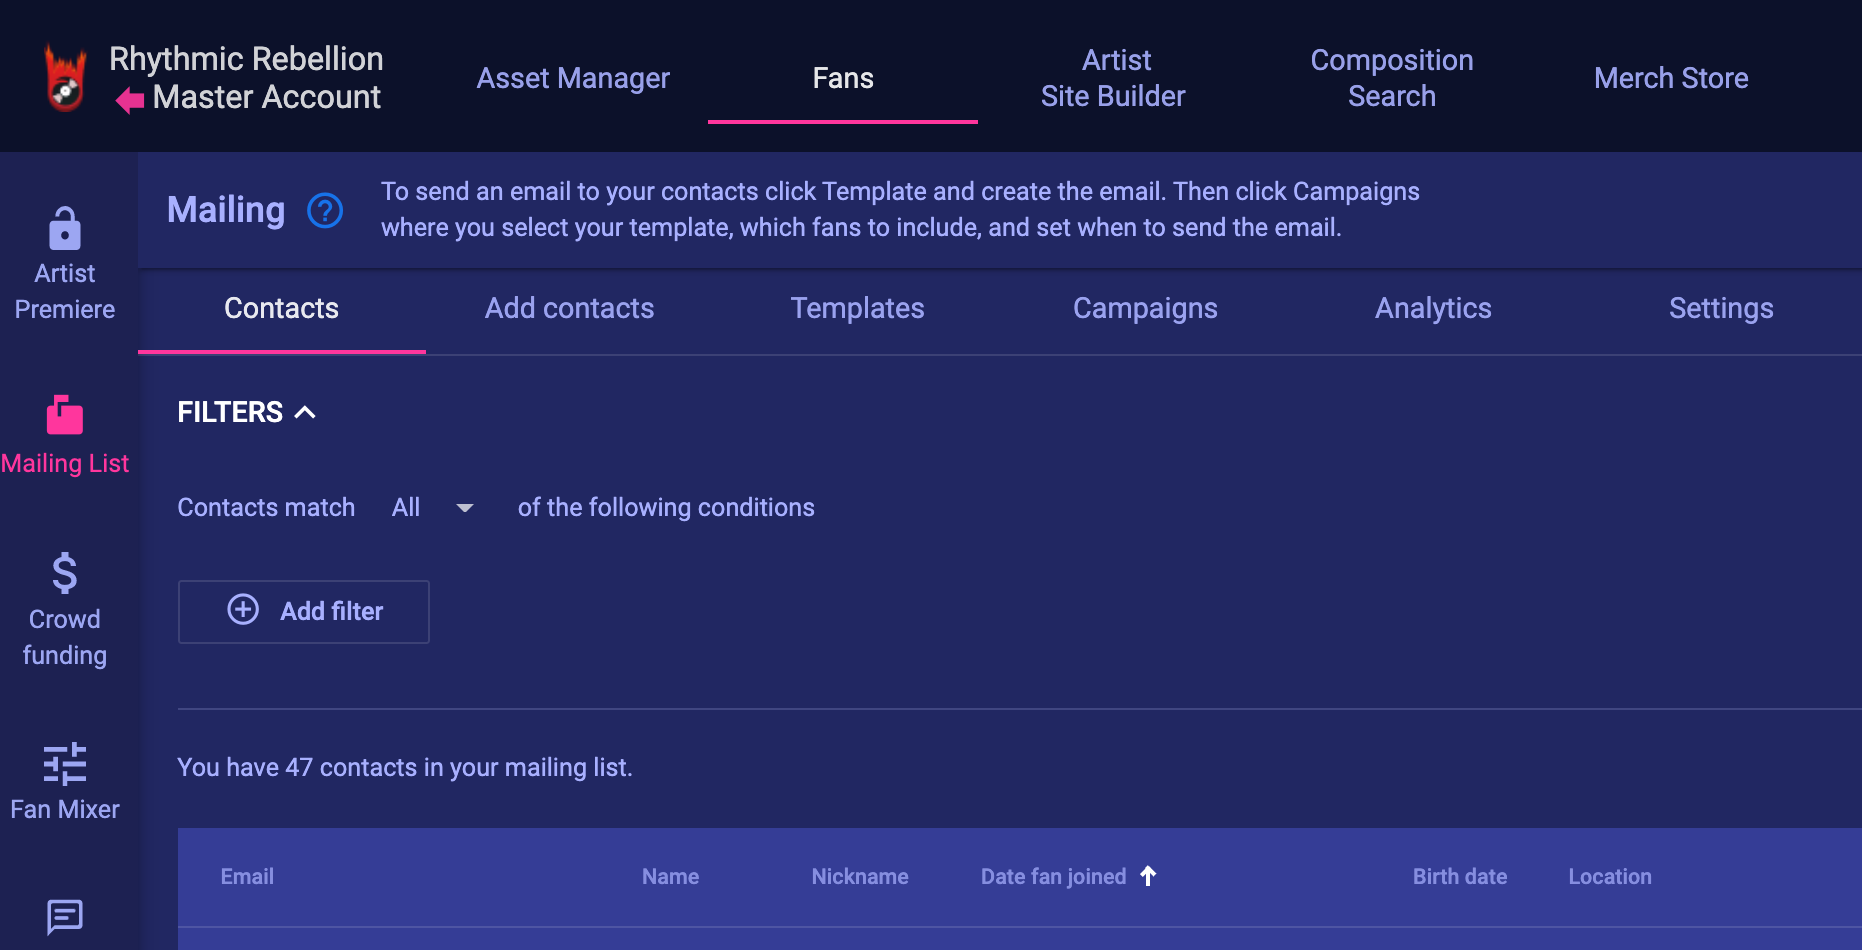

Contacts
Depending on how fans joined, your Contacts will be organized by 7 different Source labels:
- All fans who share their email with you will be listed in this table under the label Mailing List.
- When a fan clicks the Follow button on your Artist site, they can choose to share their email with you. These types of contacts have a Shared label.
- Some fans may not share their email when they follow you. Don't worry, as they still go to your contacts but with the "Not Provided" label instead of a fan's email - they have a Follow label.
- All fans who purchased from you will be listed under the label Purchase. Customers' email addresses in the "Email" column are hidden if they bought products that do not need shipping.
- If a fan joined you after following a referral link, they will have an Invite Friends label.
- Fans who subscribed to your Fan Club are listed under the label Fan Club.
- If you imported pre-existing subscribers, they will be displayed under the Imported label. Use the "Source" dropdown to filter the mailing list display.
 Use the Add Filter button to manage your subscribers. The All / Any dropdown allows you to select the rule for filters a user can apply:
- When you select All in the dropdown, applied filters narrow down results by selected characteristics such as Status and Source.
- When Any is selected in the dropdown, search results include records where the data in the rows contain at least one of the values in the filter, Status or Source.
Here are some examples of how to use filters:
- To select contacts who live in a certain location, set All in the dropdown, add the Location filter and type in the desired country. Use "is within/is not in" condition to change the request.
- To select only a few email addresses from active subscribers, set Any in the dropdown, add the Email filter and type in the desired emails.
- To select contacts who purchased from you, set All in the dropdown, add Engagement filter and select Purchase in the dropdown.


Fan Club Filters
All newly created fan accounts created to purchase a subscription to one of the artist's Fan Club Tiers are added to the artist mailing list with Source - Fan Club and Engagement - Purchase.
The additional set of filters is added to the Add Filter dropdown.

- The Tiers filter contains the list of the Active and Past Fan Club Tiers. Past Tiers are shown only if at least one subscriber from the past Tier exists in the Mailing List.
- Subscription Status - Active / Past - represents the current subscription status
- Date Subscribed - Date picker - From / To - allows you to choose the exact date range.
- Total Payment - The filters work as ≥ - greater than or equal, which displays the subscribers with payments greater or equal than the inputted number.
- Date of Cancellation - Date pickers - From / To - allows you to select subscribers who have already canceled the subscription during the selected date range.
- Next Billing Date - Date pickers - From / To
- Last Billing Date - Date pickers - From / To
Fans who have already purchased the active or past subscription (even engaged with other sources different from Fan Club) will have the dropdown mark on their rows. Clicking on the dropdown will unfold the Fan Club info:

Export Contacts
- Choose the email addresses you want to export by selecting various filters.
- Click the Export button. It will create an CSV file that will be saved to your computer with selected contacts included.
- If none of the filters were applied, then all contacts will be included.
Import Pre-Existing Subscribers To Your Contacts
- NOTICE: Importing emails into your contacts list does NOT sign your fans up as RR members. You can email them, but for them to buy items they will still need to create their RR account.
- Only approved artists can import contacts or use the mailing system. To become approved by Rhythmic Rebellion you need to use the Contact Us form.
- Once you get access to the Add contacts tab, click the Add New Contacts button.
- Select Upload File to import your own database of email addresses using a CSV file or Excel file. Select the desired file in the dialog window and click Open. The pop-up window will appear to confirm that you have permission to send emails to your fans. Click the Confirm button to upload the file!
- If you have a Mac computer and no access to Excel, you can use the Mac Numbers program to edit the file then do the following:
-
Click File in the top left corner. On the dropdown menu hover over Export To. Select the CSV option.
Another option is to use Google Sheets to edit the file, then download it, then upload it to your contacts.
Rhythmic Rebellion respects the recipient's privacy and security. That's why you have to confirm that ALL contacts you're uploading gave you permission to send them promotional and informational emails. Rhythmic Rebellion reserves the right to cut off your email sending in order to prevent abuse.
- Click the Add New Contacts button to add one member at a time. Add the contacts' details including email, name, birth date and location. Check the permission box and click the blue Add button to complete this contact card.

Important: For emails to be recognized and imported correctly by our software, check that the respective columns have one of the possible titles.
| email
email address email_address emailaddress email_1 e_mail_1_value e_mail_address |
|
| Name | first_name
first name firstname given_name name first_name |
| Location | state
address_1_region address_2 home_state country location address_1_country address_3 home_countryregion |
| Birth Date | birthday
birth-day |

How We Prevent Email Addresses From Becoming Stale
- You may have subscribers that you haven’t engaged with regularly. Whenever you import your own contacts, they will automatically be labeled with an "Unverified" status. In order to decrease bounces, Rhythmic Rebellion requires these contacts to be verified.
-
Select emails you want to transfer to your Contacts tab or do nothing and click Verify Email button. Rhythmic Rebellion uses a service that is able to filter out "bad" emails.

- If an email address went through the system validation successfully, it gets a " Verified" status and goes to the Contacts tab. Otherwise, it will be marked as "Invalid". Invalid email addresses result in unnecessary bounces.

Email Templates
Create and save pre-written emails that can be used for fast email creation. This is reusable content that helps you save time and be consistent with your messages.
How To Create A Template
- Click the Templates tab.
- Click the Create Template button.

- Fill out the Subject field. This will also be the name of your template.
- Select a Header image that will display at the beginning of the email. It can be your logo or something that your fans will easily recognize. It is possible to select how this image should be resized to fit its container. The default setting is Fill. The image keeps its aspect ratio and fills the given dimension. It will be clipped to fit inside the header space. Using Fit, the image keeps its aspect ratio, but can be resized to fit within the given dimension. Position shows how the image will be positioned within its container. Click the Preview button at the top right corner to see how the email will look when sent.

- Type your message to your fans in the Content section. Each email contains the default welcome message you can use to personalize it. A special tag *|FAN_NAME|* inserts a recipient first name to the email. Be concise and check the text for typos. Do not use spammy words, foul language or other content that can be defined as abuse and might affect email delivery.
- To place a GIF in the email, download the GIF file to your computer. Then drag the file onto your email creator form. The GIF will load and instantly start playing.
- To place a link to your YouTube video, click the Insert Video button on the toolbar and the system will auto-generate thumbnail image with a “play” button. Recipients can click on the thumbnail in the delivered email and watch it in a new browser window.

- It is possible to add multiple buttons throughout the entire template by clicking + icon (Add button). Also, you can provide a separate Button link at the bottom of your message by placing the URL in the Link section. Be sure to name your button!

- Click the Preview button to see what your newly created template looks like. Once you're satisfied with your template, be sure to click the Save button! All created templates will be included inside the Templates tab and will be readily available in the list of templates when you are composing a new campaign.
Note that it is forbidden to remove a template that is currently being used for an active campaign.


Add A Background Image Or Color To Your Template
Create a stunning view of your email via adding background image, solid color, or gradient to the email body or content using the Background styles menu.
To design the email page/content background mark one of the desired checkboxes to see available options. Tick the Color or set up the Gradient via the Color Picker.

Select an Image tab if you want your fans to see it as a page or content background.
Decide how this image should be resized to fit its container between Fill and Fit as you did it for the Header image.
Choose Repeat for the repeating pattern of your image.
No repeat is mostly used for large images. If it still doesn't cover the whole space, click "Choose a color to fill remaining space" checkbox to apply a color to it.
Test the look and feel of your template via the Preview button at the top right corner.
Keep in mind that background images/colors are not rendered by every email client, so it is possible to not see it in the delivered email. A vast number of email readers are even deliberately turning off images to reduce load time and improve email speed. Take a look on the list of supported email clients.
Email Campaigns
Click the Create Campaign button. You will be provided with a form that consists of 4 parts: Sending Options, Template, Contacts and Mail Service.

- Open the Template menu.
- Select a pre-existing Template or create a new one.
- Open the Contacts menu.
- Select the recipients you want to email. Only verified email addresses are gathered here. Choose a Date Fan Joined filter to select fans by the date they joined or select fans by their birth date. Open the Engagement dropdown to filter fan’s emails by the way they interact with you. Here you can select fans that used a Gift Code for purchase or have not bought products from you yet. This is helpful to filter out new fans you want to send a welcome email to!

- Open the Sending Options menu.

- Select Send Now to send your campaign immediately or schedule a set date to send the email out at a designated future date and time. Select the date, time, and time zone, then click the Send Emails button. The fans will receive your message at the date and time specified.
- Mail Service menu gives you the option to select where you want your fans see this message. Mass Mailing is available to trusted only artists.

- Click the Preview button at the top of the form to see what your email content looks like. Use the preview to check for any errors and inspire new ideas or content you may want to add!
- Click the Save Draft button to save this campaign without sending it. To save a draft, you must select a pre-existing template or choose to create a new one.

- To send a campaign, click the Send button. You must confirm that the list of contacts has not been purchased and that your message complies with the most basic rules: It cannot contain offensive language or materials that are violent, pornographic or sexual.


Analytics
The email analytics dashboard is a tool that helps artists to understand how effective their campaigns are. Rhythmic Rebellion provides several Email Analytics Metrics:
- Delivered emails: Shows the total number of delivered emails from the total number of messages sent.
- Open rate: Shows the total number of opened emails by every recipient from the number of delivered in figures and percentages.
- Bounce rate: This rate is significant because it shows how many emails were not delivered to recipients for various reasons. There are two possible types of bounces: "soft" and "hard". A hard bounce means that this email is permanently rejected because the email address or domain name is invalid. You need to remove these email addresses so you only use valid ones in the future. A soft bounce refers to some temporary issues with email delivery like full inbox, maintenance of the recipient’s server, and thus can be resolved.
- This metric is not applied to RR messages, because they all are delivered!
-
Unsubscribe rate: Select this column to see the total number of contacts who have opted-out.


Settings
To stay in touch with your fans, Rhythmic Rebellion sets up your email address as the default mailbox for receiving reply emails. If you do not want to reveal your email address, you can create a special mailbox for your fan replies.
Nevertheless, you can select "No" and all fan replies will be sent to the unmonitored mailbox created by the system.

Frequently Asked Questions
How Many Messages Can I Send?
Rhythmic Rebellion offers free email address validations (up to 5,000 per month!) and free messages (up to 5,000 per month!). You can manage them from the Storage tab of your Account Profile.
How Long Does It Take To Verify Subscribers' Emails?
Verifying large numbers of email addresses can't be done at lightning speed. All of this validation happens in real time, so allow appropriate time for your fans to validate their emails and grant their permission for you to use their email addresses.
How Do I Engage New Subscribers?
It's very easy to add the Mailing List Feature in your Artist Site Builder! You don't have to be familiar with coding or anything - just add this feature on your page and adjust its settings and appearance. We will validate your future subscribers' emails and send them your "Welcome Email" to help prevent a high email bounce rate.
Good To Know...
You can use Rhythmic Rebellion tools only for lawful purposes and in accordance with our Standard Terms of Use.
To comply with the law (CAN-SPAM Act) your subscribers have to know how to opt-out of receiving upcoming emails from you. That's why we have this Unsubscribe button at the bottom of the each email. When a fan cancels the subscription, their email will be marked with an Unsubscribed status and will be automatically excluded from your future emails.
